 how-to
7 Steps to Mitigate Water Damage Before Mold Sets In
Last Updated: November 1, 2026
Quick Summary
To mitigate water damage, stop the water source and cut power to flooded rooms first, then extract standing water, tear out soaked materials that cannot be saved, and dry with fans and dehumidifiers. Carpet and backing should be dried within 24 to 48 hours to prevent mold.
- Shut the main shutoff valve if the leak source is unclear, and pull the plug on leaking appliances first.
- Cut drywall 12 inches above the water line and remove wet insulation behind the cut.
- Carpet usually dries in 24 to 48 hours with good airflow, while walls take longer.
- Photograph the water line and leak source before major tear-out for your insurance claim.
- Call a professional when water reaches electrical systems, exceeds a few inches, or sits longer than a day.
Table of Contents
- Act Fast: The First 10 Minutes of Water Mitigation
- Water Damage Restoration Steps: From Extraction to Verification
- How to Dry Out Water Damage in Walls, Floors, and Carpet
- Water Damage Restoration Do's and Don'ts
- Water Damage Insurance Coverage: What to Document and Claim
- When to Call a Professional Water Mitigation Team
- Get a Quote for Professional Water Mitigation
- Frequently Asked Questions
Act Fast: The First 10 Minutes of Water Mitigation
The first ten minutes decide how much you lose. According to EPA guidance on water damage cleanup, carpet and backing should be dried within 24 to 48 hours to prevent mold. Learning how to mitigate water damage starts with one truth: speed beats every other factor.
Fast action saves floors, walls, and money.
Most guides start with drying. Start with stopping the water and killing the power.
Stop the Water Source and Cut the Power
Find the leak before you find a towel. Shut the main shutoff valve if the source is unclear. For appliance leaks, pull the plug on the machine first.
Then cut the electricity. Water and live current do not mix.
- Turn off breakers for flooded rooms at the panel
- Never stand in standing water to flip a switch
- If the panel itself is wet, call an electrician and stay out
Touching a wet outlet or extension cord can cause serious shock. Treat every wet surface as live until the breaker is off.
Assess the Damage and Document Everything
Walk the space with your phone camera rolling. Film the water line on walls, soaked furniture, and damaged boxes.
This footage becomes your insurance evidence. Document before you move a single item.
- Photograph each affected room
- Note the time you found the water
- Save any receipts for emergency purchases
Water Damage Restoration Steps: From Extraction to Verification
Water damage restoration steps follow a fixed order: extract, remove, dry, verify. Skipping a stage causes secondary damage later.
For a deeper walkthrough of the full process, see our guide on water damage restoration in Yuma AZ.
Remove Standing Water With a Water-Extraction Vacuum
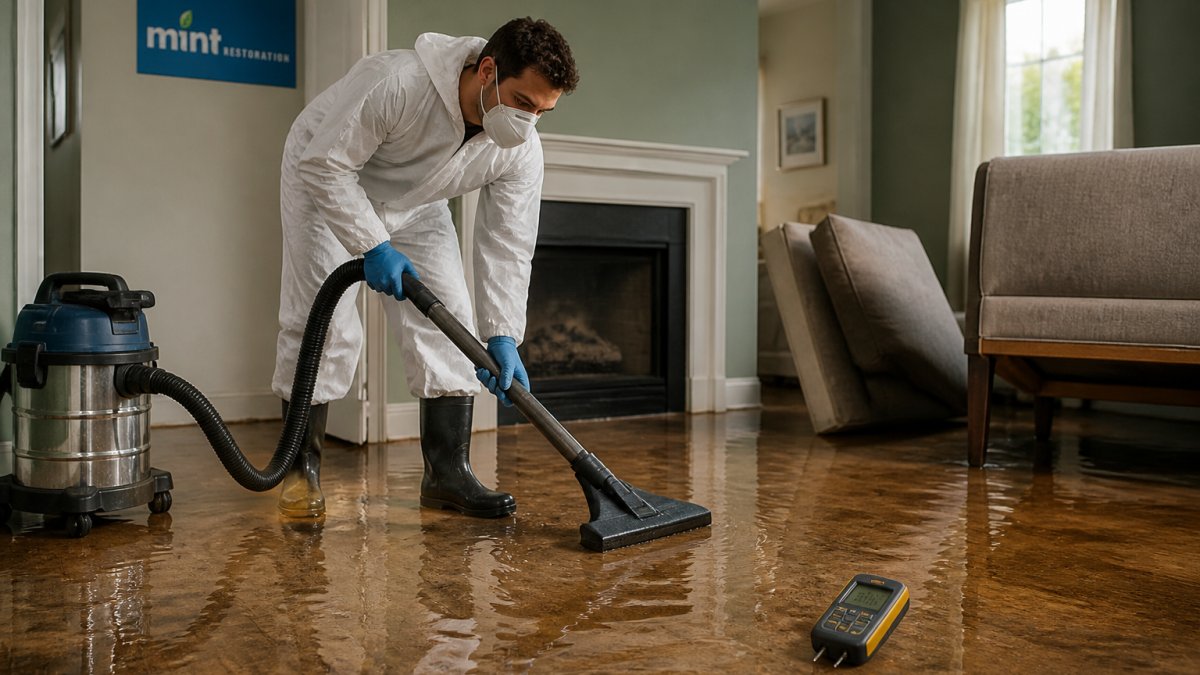
Standing water comes out first. A wet/dry shop vac or water-extraction vacuum pulls water from carpet and hard floors.
Work from the farthest corner toward the exit.
- Empty the tank often
- Check for electrical hazards before each pass
- Move furniture to dry ground as you go
Tear Out Soaked Materials That Cannot Be Saved
Some materials never dry fast enough. Saturated carpet padding, swollen particleboard, and sagging drywall should come out.
This is not waste. It is mold prevention.
- Pull carpet padding, keep the carpet if salvageable
- Cut drywall 12 inches above the water line
- Remove wet insulation behind the cut
The restoration process follows a fixed order, and skipping a stage causes secondary damage later.
| Step | What to do |
|---|---|
| Extract | Remove standing water with a wet/dry shop vac or water-extraction vacuum |
| Remove | Tear out soaked carpet padding, swollen particleboard, and sagging drywall |
| Dry | Use fans for airflow and dehumidifiers in closed rooms |
| Verify | Check moisture readings daily with a meter and log them |
How to Dry Out Water Damage in Walls, Floors, and Carpet
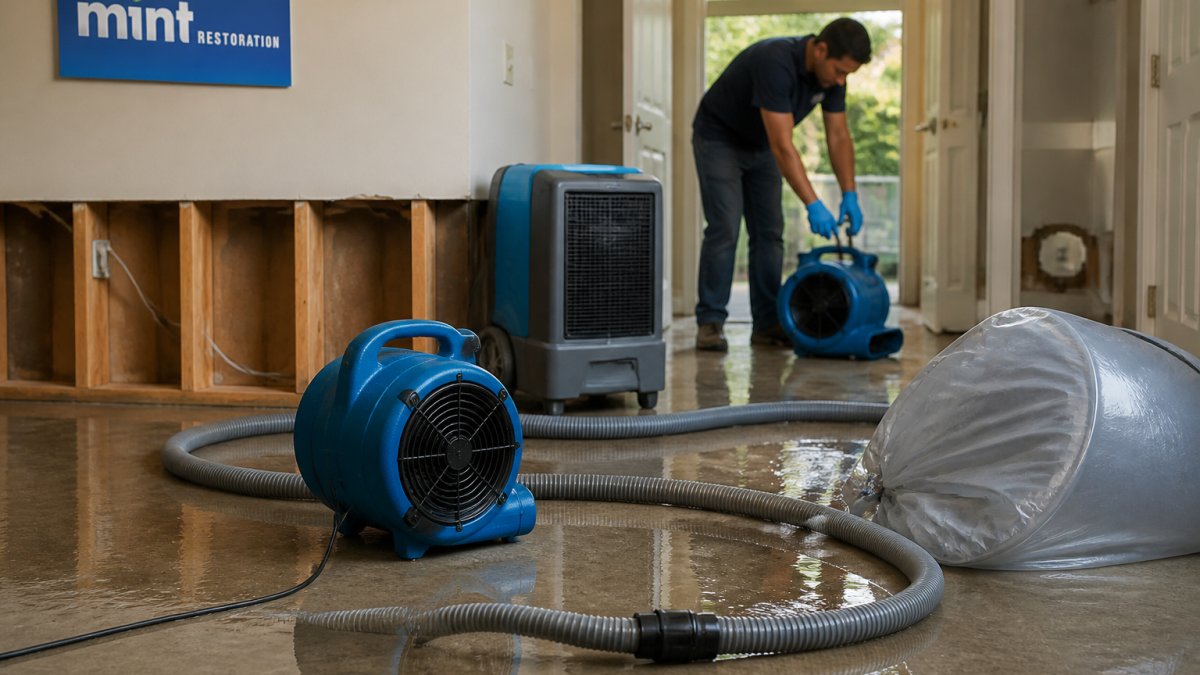
Drying is airflow plus time plus measurement. Fans move air, dehumidifiers pull moisture from it, and open windows help only when outside air is drier than inside. Verification matters: surface-dry is not the same as fully dry.
For a deeper walkthrough of the full process, see our guide on water damage restoration in Yuma AZ.
Set Up the Drying System
- Position fans to push air across wet surfaces, not into corners, airflow across the surface is what evaporates water.
- Run dehumidifiers in closed rooms; in an open room they pull moisture from the whole house and never get ahead of the load.
- Open interior doors for cross-ventilation, but keep exterior doors and windows closed when the outdoor dew point is high, humid outside air slows drying and can re-wet materials.
- Check moisture readings daily with a meter and log them; a written log is also useful evidence for an insurance claim.
Carpet usually dries in 24 to 48 hours with good airflow. Walls take longer. Do not restart the HVAC until the system is checked, running air conditioning through wet ductwork can spread moisture and mold spores through the house.
Measure Moisture Instead of Guessing
A pin-type moisture meter reads the percentage of moisture in wood, drywall, and framing at the point of contact. A pinless (capacitive) meter scans a wider area without leaving holes.
Common drying targets used in the restoration trade:
- Wood framing and studs: typically 12% to 15% moisture content, or within about 4 points of an unaffected reference piece in the same room.
- Drywall: usually under 1% on a pin meter, or within 2 points of dry drywall in an unaffected room.
- Subfloor and hardwood: often 10% to 12%, again compared against a dry reference board.
The reference-piece method matters more than any single number. Wood and drywall equilibrate to the room, so the honest question is not "is this 12%?" but "is this the same as the dry wall across the hall?"
Monitor Humidity, Not Just Surfaces
A thermo-hygrometer (humidity monitor) costs little and tells you whether the dehumidifier is winning.
Watch the dew point too. If the dew point inside is higher than the outdoor dew point, ventilating with outside air helps. If it is lower, ventilation brings moisture in, keep the house closed and rely on dehumidification.
Know When Materials Are Actually Dry
Surface feel is the least reliable test, drywall paper can feel dry while the gypsum core and framing behind it are still wet.
If readings stall for two days despite running equipment, the moisture is likely hidden: behind baseboards, under flooring, inside a wall cavity, or in insulation. For the full process, read our step-by-step guide on mold in walls. That is the point to open the wall or call a professional with thermal imaging and penetrating meters.
Water Damage Restoration Do's and Don'ts
The water damage restoration do's and don'ts come down to safety and salvage. Get these right and you avoid most costly mistakes.
Do:
- Shut off power to wet areas
- Wear gloves and boots in floodwater
- Photograph everything for your claim
Don't:
- Use a household vacuum on standing water
- Walk through floodwater barefoot
- Wait days to start drying
Floodwater can carry bacteria and chemicals. A National Institute of Environmental Health Sciences case report described a family that developed health problems after renting a water-damaged home, which was later analyzed for mold and bacteria.
Water Damage Insurance Coverage: What to Document and Claim
Water damage insurance coverage usually pays for sudden and accidental events, not slow leaks. Most policies cover burst pipes and storm intrusion. Many exclude long-term seepage, repeated leakage, and maintenance failures, and the difference between a paid claim and a denial often comes down to how well you documented the loss before cleanup.
Water damage makes up nearly 24% of homeowners insurance claims, according to The Allen Thomas Group, with many claims exceeding $12,500.
Document Before You Discard
The most common claim mistake is throwing away damaged material before the adjuster sees it. Insurers generally want to inspect or at least see photographic evidence of the damaged items in place. Once carpet, drywall, or furniture is at the curb, the burden shifts to you to prove it existed and was damaged.
Build the claim file before major tear-out:
- Photos and video of every affected room, shot wide first and then close, with a tape measure or coin in frame for scale
- A written inventory of damaged items with age, approximate replacement cost, and condition before the loss
- Receipts for emergency purchases, fans, dehumidifiers, towels, temporary lodging, meals if your policy covers additional living expenses
Notify Your Insurer Promptly and Ask Three Questions
Call your insurer before major tear-out. Most policies require prompt notice, and delay can be used to reduce or deny a claim. When you call, ask three specific questions:
- Is emergency mitigation covered, and do I need prior approval? Many policies reimburse reasonable emergency steps to prevent further damage even before an adjuster arrives, but the rules vary.
- Will you assign an adjuster, and when? Get a name and a timeline in writing if possible.
- Do you require a proof of loss form, and what is the deadline? A sworn proof of loss is a formal statement of your claim; missing its deadline is a common reason claims get complicated.
Keep a written log of every call: date, time, who you spoke with, and what they said. If there is a dispute later, that log is your record.
Understand the Claim Mechanics
Most homeowners policies pay claims on one of two bases. Actual cash value pays replacement cost minus depreciation, the aged value of the damaged item. Replacement cost value pays what it costs to replace with a new item of similar kind and quality, usually after you complete the repair. Know which one your policy uses before you set expectations.
You will also have a deductible, and a separate dollar limit may apply to certain categories such as sewer backup or sump-pump overflow. Those endorsements are often sold separately, so check your declarations page rather than assuming coverage.
If your mortgage company is named on the policy, claim checks may be payable to both you and the lender, and the lender may require the funds to be held in escrow and released in stages as repairs are completed.
Coordinate With the Adjuster and the Contractor
The adjuster and the remediation contractor should work from the same scope. Ask the contractor for a written scope of work with moisture readings, affected square footage, and material quantities, and share it with the adjuster.
Do not sign a contract that assigns your claim benefits to a contractor without understanding what you are signing.
When the Claim Is Denied or Underpaid
If a claim is denied, ask for the denial in writing with the policy language cited. Common grounds include long-term seepage and maintenance neglect. If you disagree, most policies include an appraisal or dispute process, and your state insurance department can explain your options. Keep every document, denial letter, photos, contractor's scope, call log, until the claim is fully closed.
When to Call a Professional Water Mitigation Team
Call a professional when water reaches electrical systems, exceeds a few inches, or sits longer than a day. Water mitigation is the work of stopping damage before mold starts.
The typical price range to restore water damage runs from $1,381 to $6,350, according to RubyHome water damage statistics. That spread reflects how much damage speed prevents.
Call us when:
- Water touched outlets, the panel, or appliances
- The space flooded from a roof leak or sewage backup
- Mold appeared within days
Mint Restoration offers 60-minute on-site response, 24/7 availability, and IICRC certified technicians. We also handle mold removal in Yuma when water sat too long. Not sure how fast a team should arrive? Read our guide to emergency water damage response times. And before you hire anyone, use these 7 vetting steps for choosing a restoration contractor.
Get a Quote for Professional Water Mitigation
Water damage gets worse by the hour, and every hour raises the repair bill. If you are facing a flooded room, a soaked ceiling, or mold that appeared after a leak, do not wait for it to spread. Mint Restoration brings over 30 years of experience, 60-minute response, and a one-year warranty on all work.
Frequently Asked Questions
What should you do first after water damage?
Shut off the water supply at the main shutoff valve and cut power to affected rooms at the breaker panel if it is safe to reach. Then document the damage with photos and call your insurance company. According to EPA guidance, carpet and backing should be dried within 24 to 48 hours to prevent mold growth, so start water extraction and drying immediately after the source is stopped.
How long does it take mold to settle in after water damage?
Mold can begin growing on wet materials within 24 to 48 hours. The EPA recommends drying carpet and backing within that window and removing water with a water-extraction vacuum. If you cannot dry affected areas within 48 hours, or if the water came from a contaminated source like floodwater or sewage, call a professional water mitigation team to assess and remediate before mold spreads.
Will insurance pay out for water damage?
Most homeowners insurance policies cover sudden and accidental water damage, such as a burst pipe or appliance leak, but typically exclude gradual leaks and floodwater. Document everything with photos, keep receipts, and review your water damage insurance coverage before filing to confirm what your policy includes.
When should you call a water damage restoration professional?
Call a professional when water has soaked into walls, ceilings, or flooring, when the affected area exceeds what fans and a dehumidifier can dry, when water is contaminated, or when you cannot verify moisture levels with a meter. Restoration costs depend on the extent of damage; contact Mint Restoration for a quote. A professional team can extract water, dry the structure, and document the loss for your insurance claim.